


Did you know that Facebook users watch more than 8 billion videos every day? A big part of that content is live-streamed. You seem surprised! But hold on!
It doesn’t stop here! Recent reports show that people watch live videos on Facebook three times longer than regular pre-recorded videos. This makes Facebook Live a strong tool for creators and businesses.
If you are one of them, you should know that getting good at Facebook Live can boost your engagement rates.
Buy an Established Instagram Account
Skip starting from zero. Browse Instagram/TikTok accounts with audiences across many niches.
See Available AccountsIf you want to learn more about this great feature, we are here to help! We will talk about important tools, how to plan before going live, ways to engage, and how to improve after you are done.
Different Types of Live Streams

That’s a great question! Let’s look at different types of live streams before we go on.
- Q&A Sessions: This is one of the most popular options! It lets you talk to your audience by answering their questions right away.
- Product Demos: Are you a business owner? This is your best choice! Use it to show your product live. This way, viewers can understand how it works better.
- Behind-the-Scenes: Let your audience see what happens behind closed doors. It always makes a difference! This is especially true if it has funny moments.
- Live Events and Webinars: Stream events like conferences, workshops, or webinars. It’s a great way to reach people all over the world and share important information.
- Live Performances: Watch concerts, plays, or art shows online. This allows artists to connect with more people and engage fans in a close, live experience.
- Gaming Streams: Gamers show their games live, talking with their audience while they play. It’s a fun way to have fun and build a strong feeling of togetherness. Do you know any well-known game streamers from your country?
Essential Equipment for Professional Facebook Live Broadcasts
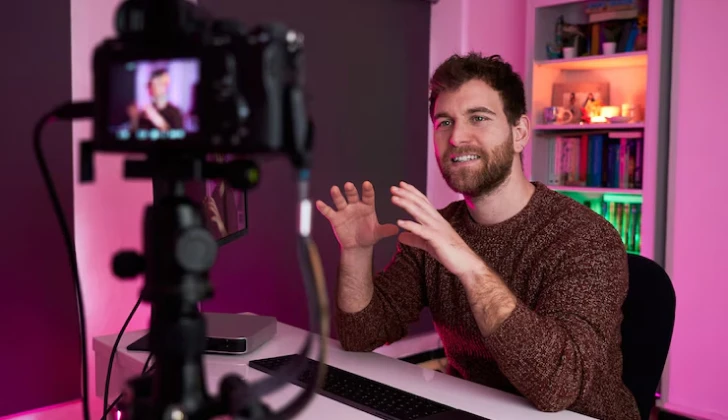
Top Camera Options for Crystal-Clear Facebook Streaming
Your camera choice significantly impacts how professional your stream appears.
Beginners: The latest smartphones, such as the iPhone 16 or the Samsung Galaxy 25, offer excellent HD video quality and built-in stabilization. (Don’t tell me you are among the people who argue over iOS or Android devices!)
Intermediate streamers: Consider webcams like the Logitech C922 or Razer Kiyo, offering 1080p resolution with improved low-light performance compared to smartphones.
Professionals: DSLR or mirrorless cameras deliver exceptional image quality with depth-of-field effects that create that polished broadcast look. However, they require capture cards like the Elgato Cam Link to connect to your computer.
Microphone Selection: Capturing Professional-Quality Audio
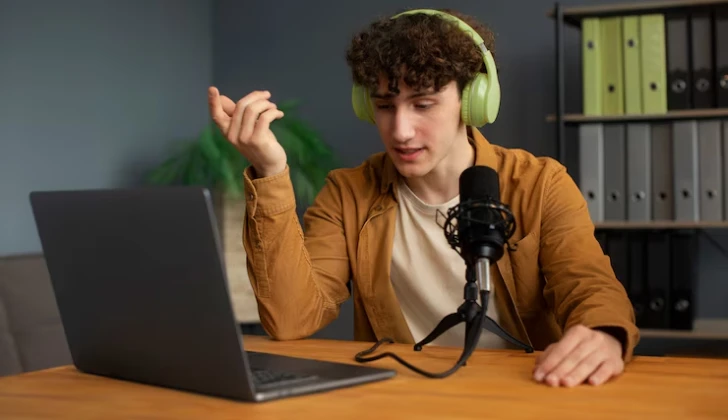
Viewers will forgive visual imperfections far more readily than poor audio. Invest in quality sound capture with these options:
Entry-level: Lavalier (clip-on) microphones connect directly to smartphones, significantly improving audio clarity over built-in mics.
Intermediate: USB microphones are simple and have superior sound quality, ideal for desk-based broadcasts.
Professional: XLR microphones like the Shure SM58 or Audio-Technica AT2020 provide broadcast-quality sound but require audio interfaces like the Focusrite Scarlett Solo to connect to your computer.
Want a professional tip? Position your microphone 6-8 inches from your mouth and test your audio levels before going live.
Lighting Setup Recommendations for Flattering Video Quality
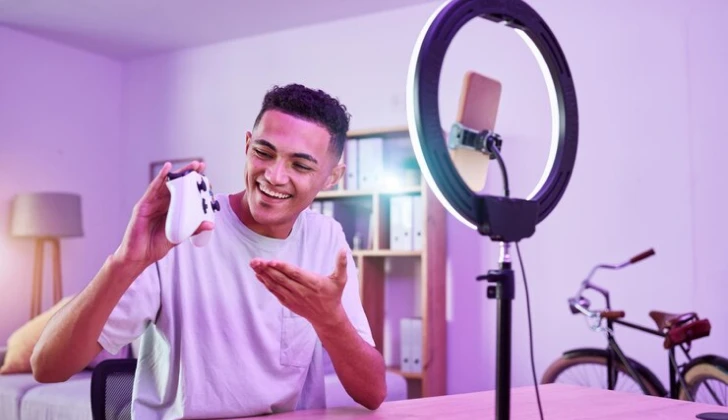
Proper lighting instantly elevates your stream’s professional appearance:
Start with a basic ring light to eliminate unflattering shadows and evenly illuminate your face.
For more control, implement a three-point lighting setup:
– Key light: Your primary light source, positioned at a 45-degree angle from your face
– Fill light: A softer light opposite your key light to soften shadows
– Back light: Positioned behind you to create separation from the background
Natural window light can work well, but it remains inconsistent throughout the day. For reliability, affordable LED panel lights provide consistent illumination regardless of time or weather.
Avoid overhead lighting that creates unflattering shadows under your eyes and nose. Position lights at eye level or slightly above for the most flattering effect.
Internet Requirements: Ensuring Stable Streaming Connections
Even perfect content fails without stable connectivity. For professional streaming:
– Wired connections are always preferable to WiFi—connect directly to your router via Ethernet when possible
– Minimum upload speed: 4Mbps for 720p streaming; 6Mbps+ for 1080p
– Test your connection before broadcasting using speedtest.net
– Close unnecessary applications and pause cloud backup services during broadcasts
– Consider dedicating a separate network for streaming if sharing household internet
If using mobile data, ensure you have adequate coverage and a data plan that supports extended streaming. Many providers throttle speeds after prolonged high-bandwidth usage.
Pre-Broadcast Planning That Guarantees Success
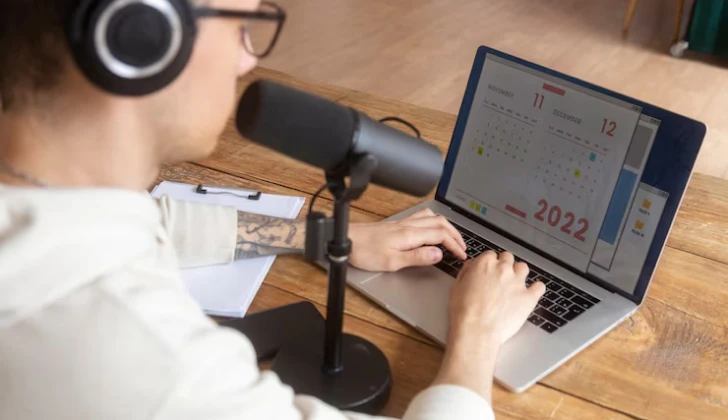
Developing compelling topics to engage users
The most successful Facebook Live broadcasts address specific audience pain points or interests:
1. Review your most engaged Facebook posts and content—what topics consistently perform well?
2. Check your competitor’s content for inspiration, identifying gaps you can fill
3. Survey your audience directly through polls or questions asking what they want to learn
4. Use tools like Google Trends to identify trending topics in your industry
5. Consider timely events, holidays, or industry developments that affect your audience
Remember that Facebook Live works best for topics that benefit from real-time interaction. Save complex tutorials or data-heavy presentations for pre-recorded content.
Frame your topic as a specific benefit rather than a general subject. Instead of “Facebook Marketing Tips,” try “5 Facebook Marketing Strategies That Doubled Our Engagement in 30 Days.” The specificity promises clear value and sets appropriate expectations.
Creating a natural outline
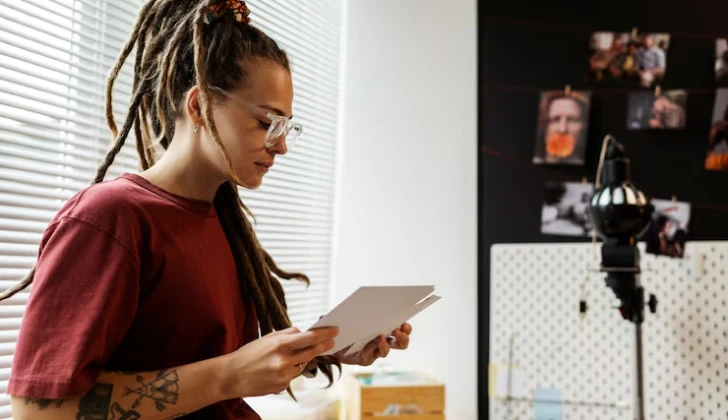
1. Create a bullet-point outline with your key talking points in logical sequence
2. Include specific examples, statistics or stories to illustrate each point
3. Note potential interactive moments where you’ll invite comments or questions
4. Prepare transitional phrases between major topics to maintain flow
5. Practice your introduction and conclusion until they flow naturally
Resist the urge to script every word, typically leading to stiff delivery. Instead, internalize your key points and practice explaining them conversationally.
Test your outline by doing a practice run, timing how long you spend on each section to ensure balanced content delivery. Most successful Facebook Lives run between 15 and 30 minutes, maintaining energy throughout.
5 Ways to Promote Your Stream Before Going Live
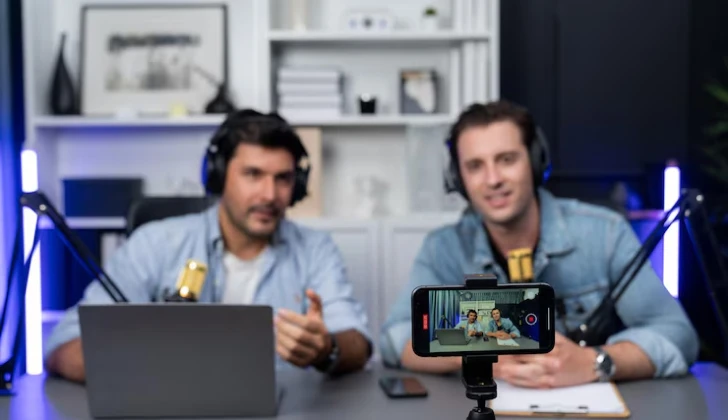
Build anticipation and maximize attendance with pre-broadcast promotion:
1. Schedule your Facebook Live at least 24 hours in advance using Facebook’s scheduling feature, allowing followers to receive notifications
2. Create teaser content highlighting the value viewers will receive—share this across all your social channels
3. Send email notifications to your subscriber list with clear time, date, and topic information
4. Create a Facebook Event specifically for your broadcast, encouraging RSVPs
5. Post a countdown on your Stories across platforms on the day of your broadcast
When promoting, focus on the specific problem your broadcast will solve or the benefit viewers will receive. For example, “Learn how to double your engagement” is more compelling than “Join my Facebook Live about social media.”
The ideal promotion timeline starts 3-5 days before your broadcast, with reminders intensifying as you approach your go-live time.
Setting Up Your Broadcasting Space for Professional Results

Your environment speaks volumes about your professionalism:
1. Select a quiet location with minimal background noise or interruption potential
2. Create a clean, uncluttered background that won’t distract viewers (or use a simple branded backdrop)
3. Position your camera at eye level to avoid unflattering angles
4. Ensure your face is well-lit without harsh shadows or backlight issues
5. Test how your setting appears on camera before going live—what looks fine to the naked eye may appear differently on screen
Consider your brand identity when designing your space. A financial advisor might opt for a professional office setting, while a fitness instructor might showcase equipment in a well-lit workout space.
Post a “Recording in Progress” sign outside your door to prevent interruptions, and silence all notifications on your devices to maintain professionalism throughout your broadcast.
Step-by-Step Technical Setup for Facebook Live

Camera Positioning and Framing Techniques for Beginners
Proper framing immediately signals professionalism:
1. Position your camera at eye level, not looking up at your chin or down at the top of your head
2. Frame yourself from mid-chest up, leaving some headroom but not excessive space
3. Follow the rule of thirds: position your eyes approximately one-third down from the top of the frame
4. If demonstrating products, plan camera angles that clearly show what viewers need to see
5. For desktop setups, position your camera directly behind your monitor to maintain natural eye contact
Remember that stabilization is critical—use a tripod or stable surface rather than holding your device. Camera movement creates viewer discomfort and appears unprofessional.
Look directly into the camera lens for optimal engagement rather than at yourself on screen. This creates the impression of direct eye contact with viewers.
Audio Testing: Essential Checks Before Broadcasting Begins
Poor audio quality is the fastest way to lose viewers:
1. Record a 30-second test video and listen with headphones to identify issues
2. Check for background noise—air conditioners, fans, or street sounds you might not notice
3. Test microphone placement—too close causes distortion, too far creates echo
4. Speak at various volumes to ensure your microphone handles dynamics appropriately
5. If using wireless microphones, ensure batteries are fresh
If you’re in an echoey space, consider sound treatment, blankets, curtains, or acoustic panels, which can improve audio quality.
How to Go Live on Facebook?
Step 1- Open Facebook on your device.
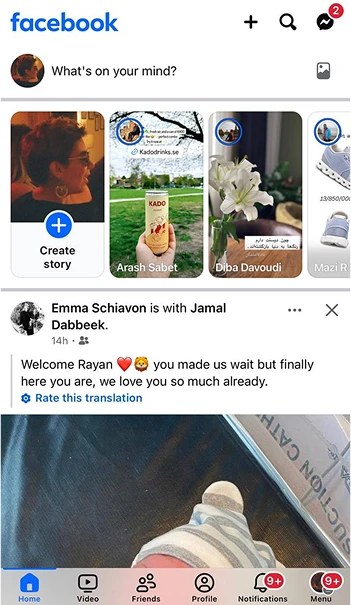
Step 2- Go to your profile.
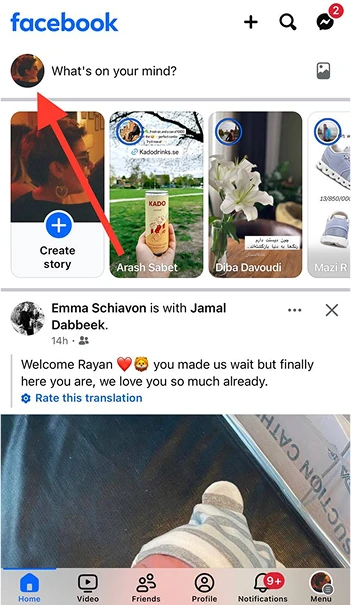
Step 3- Tap “Live” under “What’s on your mind?”
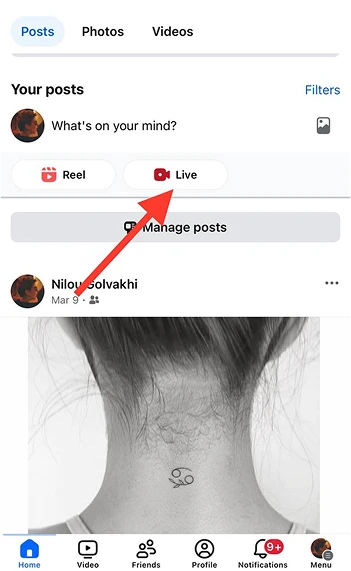
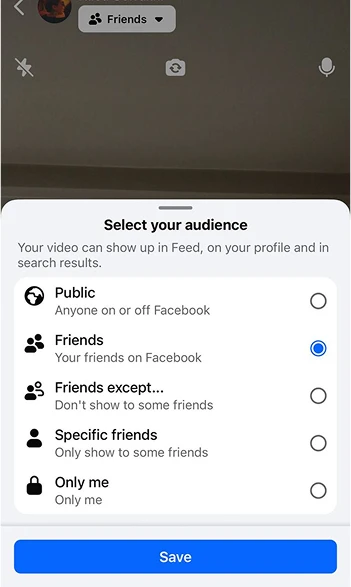
Step 4- Set your privacy and determine who can view your live stream. Do it by tapping “Friends” under your username. Then, select your preference among the options.
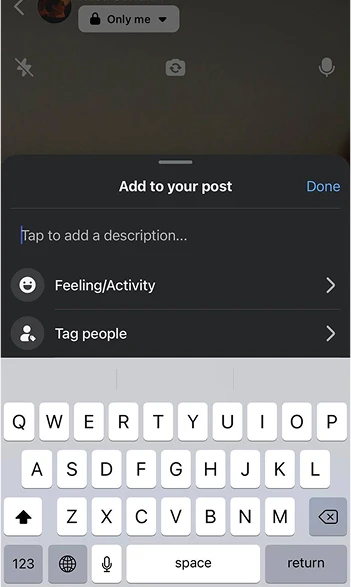
Step 5- Add a relevant description.
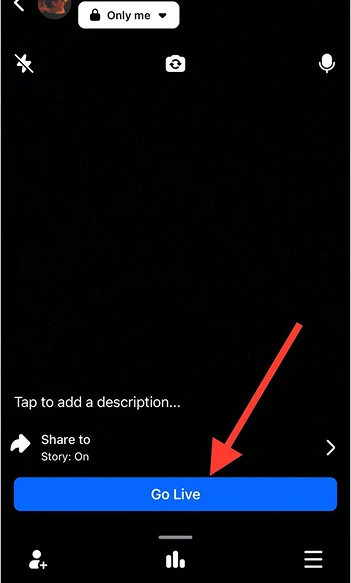
Step 6- Tap “Go Live” to finish the process.
You can follow the same process on the desktop.
How to Configure Facebook Live Settings Effectively

Optimize your broadcast reach through proper configuration:
1. Choose between personal profile, page, or group broadcasts based on your target audience
2. Set appropriate privacy settings—public for maximum reach, restricted for more intimate conversations
3. Write a compelling description using keywords relevant to your content
4. Add a location tag to improve local discovery
5. Select appropriate topic tags to help Facebook categorize your content correctly
6. Enable or disable comments based on your engagement strategy
For business accounts, cross-posting to multiple pages can significantly expand your reach. Configure this in your Publishing Tools section before going live.
Enable the “Live Contributors” setting if you have team members managing comments or helping with moderation during your broadcast.
Pros and Cons of Using Third-Party Software vs. Native Facebook Tools
Choose the proper broadcasting method for your needs:
Native Facebook Live (mobile or desktop):
– Pros: Simplicity, no additional software needed, immediate setup
– Cons: Limited customization, no screen sharing on mobile, minimal visual enhancements
– Best for: Beginners, spontaneous broadcasts, informal content
Third-party software (Streamyard, OBS, Ecamm Live):
– Pros: Multiple camera angles, screen sharing, custom graphics, guest interviews
– Cons: Learning curve, additional cost, potential technical complications
– Best for: Professional broadcasts, planned content, brand-focused presentations
For beginners, start with native tools until you’re comfortable with basic broadcasting, then gradually incorporate third-party solutions as your content strategy evolves.
Engagement Strategies During Your Live Broadcast

Participate with your audiences:
1. Ask specific questions rather than general ones—”What’s your biggest challenge with Instagram engagement?” outperforms “Any questions?”
2. Create participation rituals—”Drop a ❤️ in the comments if you’ve experienced this too”
3. Acknowledge early participants by name: “Welcome, Sarah! Great to see you here.”
4. Run impromptu polls: “Type 1 if you prefer Instagram Stories or two if you prefer Reels”
5. Offer incentives for participation, like resource downloads or shoutouts
6. Create lightning rounds where you answer rapid-fire questions for a set period
7. Use the “first five” technique—announce you’ll address the first five comments that answer your specific question
Plan engagement prompts throughout your content rather than clustering them at the beginning or end. This maintains interaction throughout your broadcast.
Remember that algorithm visibility increases with engagement—more comments and reactions lead to greater reach during and after your broadcast.
Respond to viewers without disrupting your content

Balancing content delivery with viewer recognition requires practice:
1. Designate specific interaction breaks every 5-7 minutes rather than constantly interrupting your content
2. Use viewer names when addressing comments: “That’s a great point, Michael.”
3. Batch similar questions to address together instead of handling each individually
4. Keep acknowledgments brief—avoid lengthy tangents about individual viewers
5. If you can’t address all comments, acknowledge this transparently: “We’ve got lots of great questions coming in that I’ll address in a follow-up post.”
Adding interactive features

Strategic interaction increases viewer retention:
1. Promise valuable information coming later: “In about 10 minutes, I’ll share the exact template we use for…”
2. Create segment transitions that reset attention: “Now we’re moving to the implementation phase where you’ll learn…”
3. Plan demonstration elements that showcase your expertise in action
4. Prepare visual aids or props that illustrate key points
5. Incorporate time-bound elements like two-minute challenges or quick exercises
6. Use countdown techniques for important points: “Here are the three most important factors…”
Vary your delivery pace and energy level throughout the broadcast. Maintaining the same tone for extended periods leads to viewer fatigue and dropout.
Consider your content’s “rhythm”—alternate between teaching, demonstrating, engaging, and summarizing to maintain interest throughout.
Managing Difficult Comments
Negative interactions are inevitable; preparation is essential.
1. Establish clear community guidelines before broadcasting
2. Distinguish between constructive criticism (address it thoughtfully) and trolling (ignore or remove)
3. Respond to disagreements with curiosity rather than defensiveness: “That’s an interesting perspective. What leads you to that conclusion?”
4. Know how to quickly block users displaying harmful behavior
5. Consider assigning a trusted team member as a moderator for larger broadcasts
Want a peaceful presence on the platform? Never argue with commenters—this derails your content and creates an uncomfortable atmosphere for other viewers. Address valid concerns briefly and offer to continue the conversation offline if needed.
Delivering Content Like a Broadcasting Professional
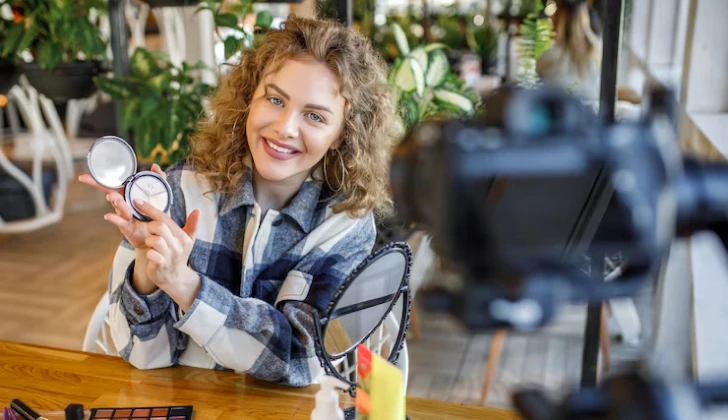
Here are small tips helping you deliver fresh content like a pro!
- Warm up, maintain good posture, and smile naturally before starting.
- Think about helping viewers, not about being nervous.
- Prepare your first 60 seconds to build confidence for the rest of the broadcast.
- Deliver the most valuable content early, break it into chunks, and vary your vocal pace.
- Acknowledge problems without over-apologizing and keep viewers informed.
- To captivate your audience, use storytelling techniques like the hero’s journey and “Before-After-Bridge.”
Follow them and the results will surprise you!
Tips for Maximizing Your Content Value After Broadcasting
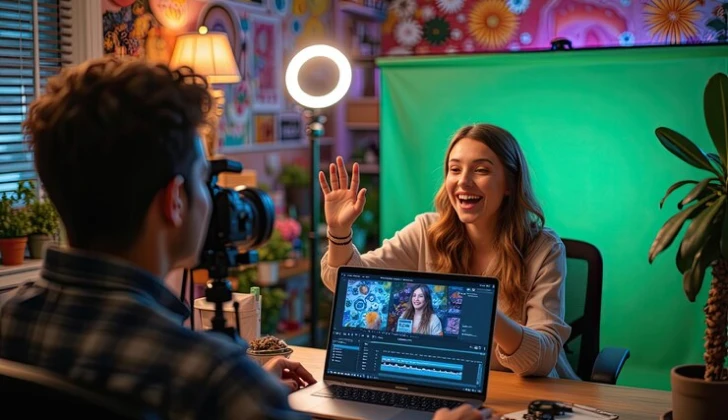
Repurposing Live Content Across Multiple Platforms
Extract maximum value from each broadcast:
1. Edit your Facebook Live recording into shorter clips (60-90 seconds), highlighting key points for Instagram Reels, TikTok, or YouTube Shorts
2. Create quote graphics from powerful statements for Instagram and LinkedIn
3. Transcribe your content for blog posts or newsletter material
4. Extract audio for podcast episodes
5. Compile related broadcasts into themed YouTube playlists or downloadable courses
6. Create Pinterest-friendly vertical graphics summarizing key points
Tools like Descript or Otter.ai can automatically transcribe your content, dramatically reducing repurposing time.
Analyzing Performance Metrics to Improve Future Streams
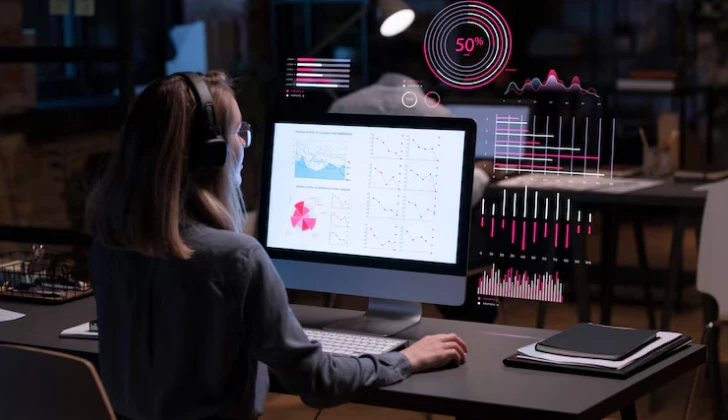
Data-driven improvements accelerate growth:
1. Track peak concurrent viewers to identify your most engaging topics
2. Analyze viewer retention graphs to pinpoint when people typically leave
3. Review comment themes to understand audience questions and concerns
4. Compare performance across different broadcast times and days
5. Note which promotional strategies delivered the highest live attendance
6. Monitor replays versus live views to understand your audience’s viewing preferences
Facebook provides detailed metrics in Creator Studio—schedule regular review sessions to identify patterns and optimization opportunities.
Remember to pay special attention to the relationship between video length and average watch time. Often, shorter, more focused broadcasts outperform longer ones in overall engagement percentage.
Best Practices for Following Up With Engaged Viewers
Nurture relationships established during your broadcast:
1. Respond to unanswered questions in the comments within 24 hours
2. Create a follow-up post thanking participants and highlighting key takeaways
3. Send promised resources or links promptly after broadcast completion
4. Tag and thank particularly engaged viewers in your post-broadcast summary
5. Direct message first-time engagers with a personal thank you and invitation to future broadcasts
6. Create an email follow-up for subscribers with additional insights not covered in the broadcast
Timely follow-up demonstrates professionalism and increases the likelihood of repeat attendance. The 24 hours after your broadcast present your best opportunity for relationship development.
Consider creating broadcast-specific lead magnets that address common questions or expand on popular topics from your stream.
Creating a Content Calendar for Consistent Live Streaming
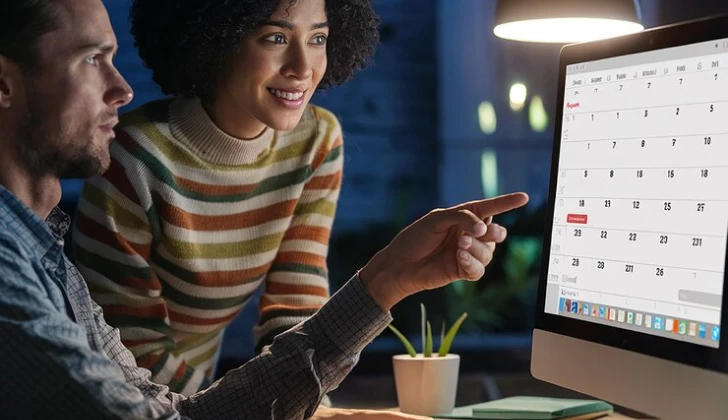
Strategic planning drives audience growth:
1. Choose a sustainable broadcasting frequency (weekly is ideal for most creators)
2. Select a consistent day and time that works for your audience
3. Plan complementary topics that build on one another
4. Map content to business objectives and seasonal opportunities
5. Schedule preparation time for each broadcast
6. Build in content breaks to prevent burnout
Document your entire process—from topic selection to promotion to execution—to create a repeatable system that reduces preparation stress.
The most successful Facebook Live creators maintain consistency above all else. Irregular broadcasting significantly reduces algorithmic favor and audience development.
Advanced Facebook Live Features Worth Mastering
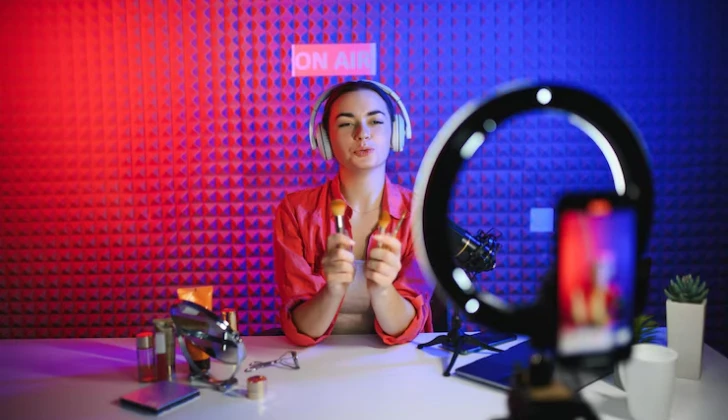
Using Screen Sharing for Demonstrations and Tutorials
Elevate instructional content with effective screen sharing:
1. Close unnecessary applications and notifications before broadcasting
2. Increase font sizes and cursor visibility for mobile viewers
3. Practice your screen navigation path to avoid awkward searching
4. Create custom desktop backgrounds that reinforce your branding
5. Use the spotlight or zoom features to highlight specific screen elements
6. Prepare backup screenshots in case of technical difficulties
When screen sharing, position your camera feed strategically—typically in the lower right corner—to maintain a personal connection without obscuring important content.
Incorporating Branded Elements and Graphics
Visual branding increases professionalism and recognition:
1. Create lower-third graphics displaying your name and topic
2. Design branded intro and outro sequences for consistent branding
3. Prepare templated slides for key points, available through third-party broadcasting software
4. Use consistent color schemes and fonts across all visual elements
5. Create transition screens for breaks or segment changes
6. Include call-to-action graphics with clear next steps
Tools like Canva provide customizable templates specifically designed for live streaming graphics.
Maintain visual simplicity—overcomplicated graphics distract from your content. Aim for brand reinforcement rather than visual domination.
Setting Up Multi-Camera Broadcasts for Dynamic Content

Advanced setups create TV-quality productions:
1. Use complementary camera angles—wide shot, close-up, demonstration view
2. Invest in an HDMI switcher like the ATEM Mini for hardware-based switching
3. Label each camera view clearly in your broadcasting software
4. Create consistent transition patterns between angles to establish rhythm
5. Use wide shots for introductions and conclusions, close-ups for emotional points
6. Establish visual cues for yourself, indicating which camera is currently live
Practice camera switching extensively before implementation—smooth transitions require muscle memory that only develops through repetition.
Start simple with two cameras before expanding to more complex setups. Master the basics of angle switching before adding additional technical elements.
Monetization Options for Established Facebook Live Creators
Transform engagement into revenue:
1. Stars: Encourage viewers to send “Stars” (Facebook’s virtual currency) during broadcasts
2. Fan Subscriptions: Offer exclusive content to monthly subscribers
3. Brand Partnerships: Secure sponsorships for regular broadcasts
4. In-broadcast product promotions: Demonstrate and sell your products or services
5. Lead generation: Convert viewers to email subscribers for further marketing
6. Donation drives: Request support for cause-based content
Monetization works best when value exceeds expectation—free content should be complete and valuable, with paid options offering enhancements rather than withholding essential information.
Be transparent about monetization methods—viewers appreciate authenticity about business models rather than disguised promotional content.
Common Facebook Live Mistakes to Avoid

Common Facebook Live Mistakes to Avoid
Technical Pitfalls
Prevent avoidable technical issues:
1. Poor internet connectivity leading to buffering or disconnections
2. Inadequate lighting creates a shadowy or grainy video
3. Background noise disrupting your audio clarity
4. Battery drainage during mobile broadcasts
5. Incorrect camera or microphone selection in settings
6. Forgetting to test your entire setup before going live
Create a pre-broadcast checklist covering all technical elements and test each component individually before going live.
Content Planning Errors
Avoid these common content mistakes:
1. Starting without a clear purpose or benefit statement
2. Rambling without structure or clear transitions
3. Spending excessive time on introductions before delivering value
4. Making promises during the broadcast that you don’t fulfill
5. Creating titles that misrepresent your actual content
6. Rushing through complex information without adequate explanation
Remember the primary viewer question: “What’s in it for me?” Every segment should clearly connect to the viewer’s benefits.
Respect viewer time—tightly edited content that delivers clear value builds reputation more effectively than lengthy broadcasts filled with tangents.
Engagement Missteps That Reduce Audience Retention
Engagement requires strategy, not just friendliness:
1. Ignoring comments completely or acknowledging them inconsistently
2. Allowing negative comments to derail your content flow
3. Reading comments aloud without adding value or perspective
4. Focusing exclusively on viewers with large followings or frequent engagement
5. Creating awkward silences while waiting for comments
6. Responding defensively to constructive criticism
Remember that engagement isn’t only about responding to comments—it’s about creating content that naturally inspires participation through questions, challenges, and emotional connection.
6 Post-Broadcast Mistakes That Limit Content Value

Maximize impact after your broadcast ends:
1. Failing to optimize your broadcast title, description, and tags after completion
2. Neglecting to trim lengthy introductions from the saved video
3. Not adding timestamps for key segments in your description
4. Forgetting to share the replay across your other platforms
5. Ignoring comments that arrive after the live session ends
6. Missing opportunities to create derivative content from successful broadcasts
The hours immediately following your broadcast often determine its long-term performance more than the live session itself.
Create a post-broadcast optimization checklist and complete it within 24 hours while the content remains fresh and relevant.
Conclusion
You are now a master of Facebook Live; however, mastering Facebook Live isn’t about perfect execution from day one—it’s about consistent improvement through deliberate practice.
Remember that your audience values authenticity over perfect videos! Technical skills can be learned, but genuine enthusiasm and expertise are what truly connect with viewers and keep them coming back.
The most successful Facebook Live creators aren’t necessarily those with the most expensive equipment or largest existing audiences—they’re the ones who show up consistently.
I hope you find this article and enjoy reading it! Follow the mentioned tips here to grow your presence on Facebook!
FAQs
How do I prepare for a Facebook Live session?
Ensure you have a good internet connection, a well-lit space, and a clear plan for your content. Test your camera and microphone, and have a brief outline of what you’ll talk about.
How to do a successful Facebook live?
Announce the date and time of your live session, keep sharing posts about your live stream, and engage with your followers before, during, and after your stream.
How long should my Facebook Live session be?
Aim for 10-30 minutes. Anything longer can risk losing viewers’ attention.
How do I make Facebook Live high-quality?
Use good lighting, like natural light or a ring light, to ensure your face is well-lit. Make sure your internet connection is stable to avoid buffering or interruptions. Stream in at least 720p or 1080p for better video quality.

Emi Daniel
Buy an Established Instagram Account
Skip starting from zero. Browse Instagram/TikTok accounts with audiences across many niches.
See Available AccountsRelated articles
-
How to Go Viral on Instagram: A Practical Guide
A viral Instagram post can begin with something very simple, like a clear idea, a familiar feeling, or a moment that makes someone think, ‘I need to…
25 min readEmi Daniel
-
Meta Ad Library: How to Find and Analyze Competitor Ads
Some ads are easy to ignore until you notice the same brand appearing in your feed again and again. You may start wondering what they are saying,…
18 min read -
Best Influencer Marketing Software in 2026: Top Platforms to Grow Your Brand
Influencer marketing used to feel optional, something you tried after you’d “done” everything else. Now it’s often the first place customers hear about a brand. The problem…
18 min read